Because i had so much fun making the first sackboy-i decided to make another one with a different body shape. I wanted to fix his head a little as i found the first one was a bit too long. (Trial and error) i have seen many Sackboy patterns but none have suited the size and shape i was after so i have made one that i think i am finally happy with!

His little sun cape is made from felt and it just pops over his shoulders and head. Its not connected although i did consider putting a button on the front of it to keep it on but it doesn't appear to have problem staying on so i thought i would leave it as is.

Here is a photo from behind. His little cape goes flying out behind him as though he was running! Its a cute arrangement and i may consider different outfits for him as he has in the game. Unfortunately time permits!

You will find this little guy in my Etsy store!! More coming soon!


Another post & another Amigurumi!
Not much has happened since my last post however i did open an etsy store and i have listed my cute Sackboy Amigurumi with sun cape in it! Find it HERE.

I have made an adorable Bob-omb which is now in my Etsy store! HERE!


Above: the completed Bob-omb from the Super Mario series!
Below: a sideways view of his little body . Note his wind up and fuse!

He stands 4 inch tall (not including his fuse) so as you can see he is a cute pocket-size!

More photos:

I will be making more of these little guys with different colours shortly!

Thats all for now! Be sure to check out my Etsy store for more Amigurumi's!

http://www.etsy.com/shop.php?user_id=7792621


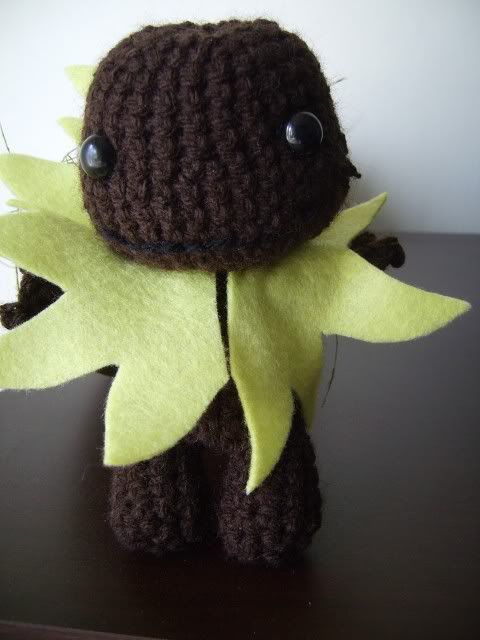
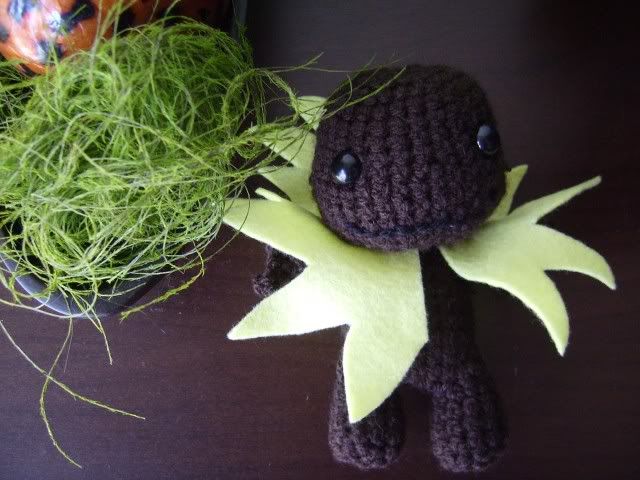
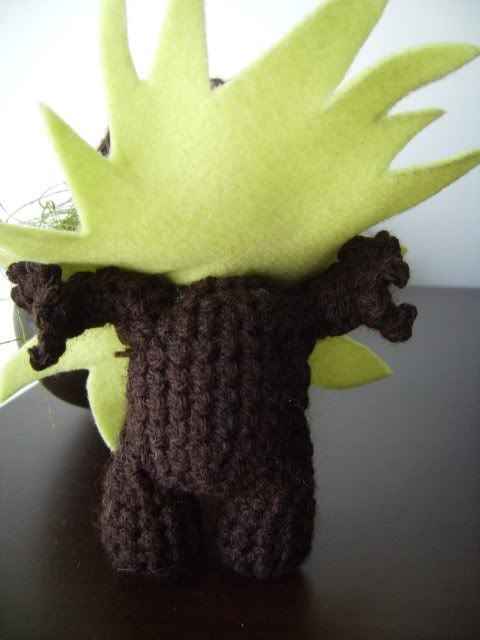
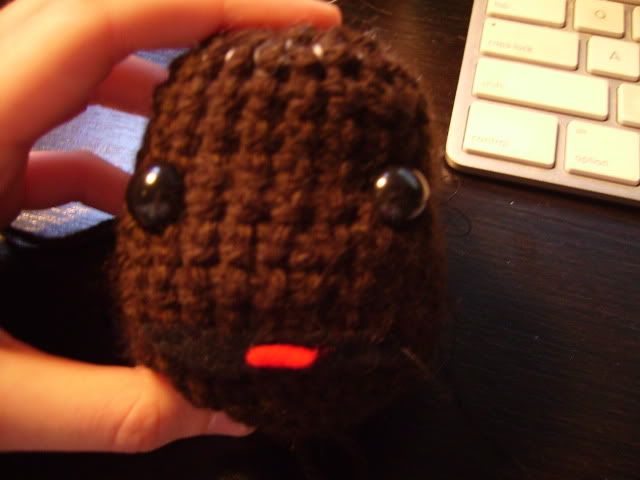
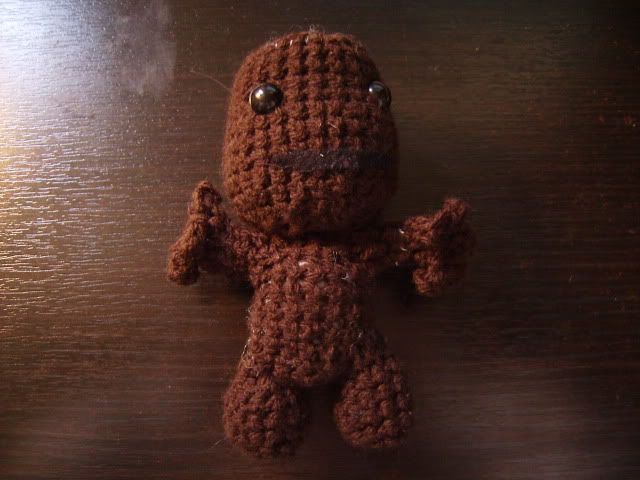
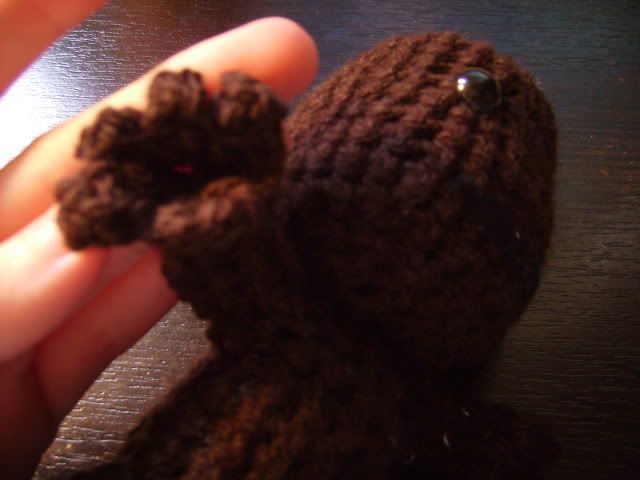
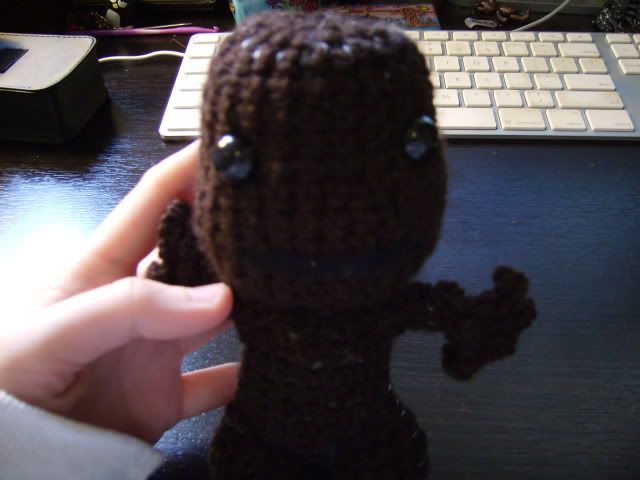
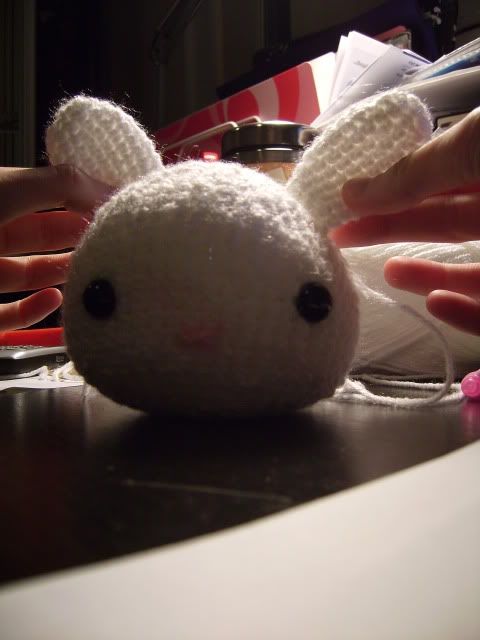
I always thought the little guy from Little Big Planet was a little bit creepy and 90% cute, so i decided to test my luck on crocheting an actual Sack Boy!
I don't think i did such a bad job but i will probably be using a lot less darker brown yarn next time so his features can be seen more clearly.
This guy stands approx 6 inches tall, unfortunately he doesn't actually stand up by himself but i think with a bigger amigurumi he would have flatter feet and more surface area to stand up on.
Pics below!


Above: The little guys head with felt mouth & tongue. Not sure at this point if i like the tongue and unfortunately due to the dark wool you can barely see his felt mouth!

Below: The almost finished product (minus the zipper and the rest of the decorative white yarn stitches)


Below: You can see his white stitches made in white thread, this will eventually follow his contours around as per the original Sack Boy!


Below: His teeny tiny fingers! There are five, and they were made by doing 5 lots of 2 and 3 chain stitches and then single crochets back down and repeating until the hand was done! Very fiddley but it is probably the most effective way of getting fingers on a miniature amigurumi without too much hastle.To make them not curl you could easily connect yarn from inside the arm tube out to the individual fingers and pull it tight to straighten them..but again this was trial and error!


Below: To get his head flat-ish i pulled string from one end of his body to the other end and back up without letting his body relax, so this kept this head squished down flat and all his pieces joined together. This technique is great when your amigurumi is a bit too bouncy, especially after you have stitched him all together.


And finally here is the little guy still almost completed but in some more artificial light. This brown wool has a habbit of turning different shades of brown-unusual but a nice effect!


Finally i have finished my Bunnie Amigurumi!
I admit it took a lot longer than expected and some parts were quite fiddley compared to others-but it was all worth it in the end!

Last night i completed his hood and scarf, 100% completed!
This little guy is now prepared to be flown to the US!
Photos below: Click image to view full size.


Above: His completed Scarf
Below: Scarf & Hood-Note the hood does have its own strings to tie it up at the front, but these aren't as visible when the scarf is placed around the Bunnie.

While making my Bunnie i did call upon some fantastic youtube videos to assist with particular stitches- the following are fantastic recommended tutorials on the different stitching techniques & how to pull them off!

  • Video for a half double crochet stitch, click HERE
  • Video for how to start a magic crochet stitch/start an amigurumi, click HERE
  • Picture tutorial, step-by-step on how to join your Amigurumi, click HERE


Finally my bunnie actually looks like a..well- a bunnie!
I do have his hood yet to complete but for now he is looking mighty fancy! I have stitched his pieces together (which was probably the hardest step so far!) and hes finally taking shape. However i did need to insert a stitch inside the entire length of his body and back out and in again to pull his parts closer together and to get a nice round overall shape. This also hid the stitching on his neck and upper arms.
Photo below! And as always click for a better view of the entire image, as blogger likes to cut them just shy of the edge of the image.


Just some more detailed photos: Lets all ignore the uneven stitches!


Below: his feet look uneven in this photo but this little guy is fairly adjustable and arms and legs can be squished into place!


Lucky last-


Wohoo- First Blog, and it's about time!
This also marks the creation of my first Amigurumi bunnie...well the first half of it anyway!
This little critter (pictures soon) will be flying off to my Partner soon! And then i can concentrate on my Ninja project which will be available for sale in my Etsy store. More info soon!

UPDATE!
5/8/2009:
Wohoo-and he's almost done! I have only his hood to do. But for now I'll post the progress photos!! (( Click the image to view the full image))


Above: (Stage 1) The very beginnings of my Amigurumi- instructions and all!
Below: Inside view, circular crochet.


After the initial stage of increasing the bunnies head i added some eyes and then started decreasing my stitch to finalize the shape!


Getting there!
Below: Finished the stitching for the head and stitched the X for the nose. Looking like a blob with eyes at this point-but still adorable. I stuffed the amigurumi just before i finished stitching him. I used a soft fluffy fibre filling, so he is very soft and squishy!


Below: i finished stitching his ears-realise done was bigger then the other Opps! In the photo below i held them up to his head *not stitched at this point* so i could see how he was shaping up!


Powered by Blogger.